Pictures speak a million words while this article only speaks maybe a couple hundred. Recently, I wanted to try building a selfie photo filter similar to what many popular apps in the app stores offer. With a little research, I was able to build out a color pop filter on Flutter using ML Kits Selfie Segmentation. Read on to learn how I was able to achieve the results I saw.
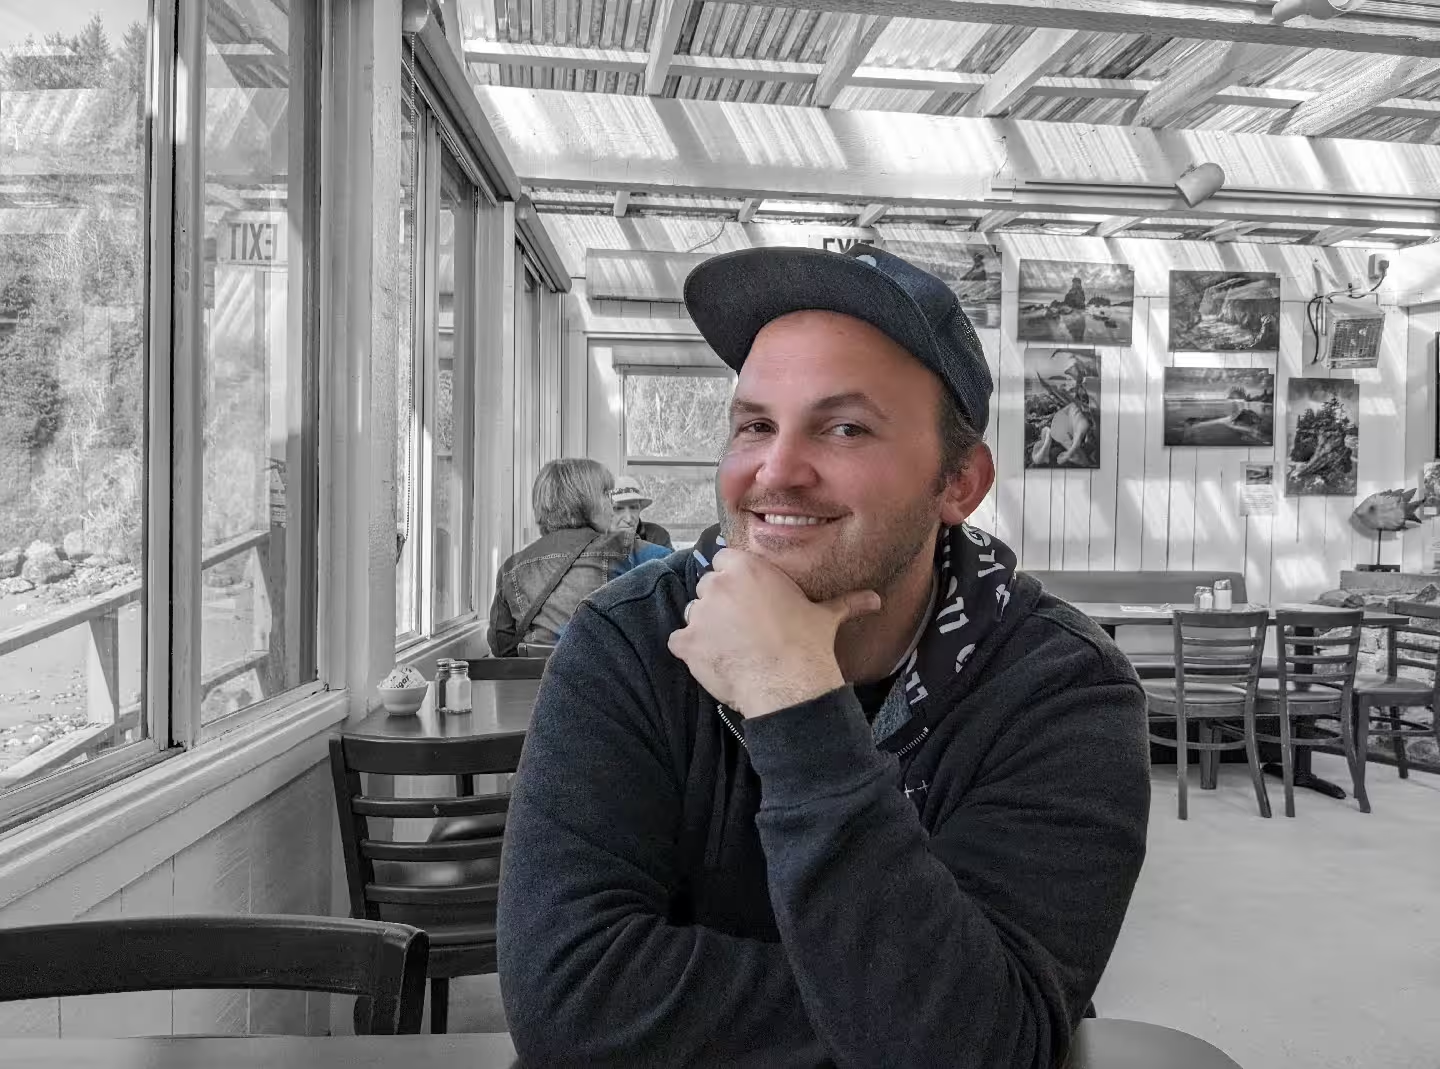
This weekend, I used ML Kit Selfie Segmentation API (https://t.co/v5gUYYQrgu) in a Flutter app. Read on for some cool #flutter features I learned along the way in building this. (Check out the color pop I made with my flutter app) 1/12 pic.twitter.com/IniqirDMQf
— Nohe - mastodon.online/@nohe (@AlexanderNohe) August 30, 2022
What is a selfie segmentation and ML Kit?
Selfie segmentation is a way of determining what pixels in an image are part of a selfie and produces a mask with confidence values within a range of 0 to 1. The closer the values are to 1, the more confident the model is that the pixel under examination is one from a selfie. ML Kit is a collection of on device models that can run to help users implement their own applications using pre-trained models. At the time of this writing, these models offer things relating to Vision API such as Selfie segmentation, pose detection, and digital ink recognition, to things relating to Natural Language, such as on device translation and smart reply.
Graying a background
When I started to set out on this project, I wanted to create a portrait like filter that grayed a background and let the selfie stand out. Graying a background is fairly easy to do as all that is required is getting the Red, Green, and Blue values of a pixel and then setting them equal to each other to get a gray color. In dart, it would look something like this:
// byteData is an array of pixels.
// This can be retrieved from an image object.
Uint8List grayImage(int width, int height, ByteData byteData) {
for (int y = 0; y < height; y++) {
    for (int x = 0; x < width; x++) {
        var rO = (y * width * 4 + x * 4);         // Red Offset
        var gO = (y * width * 4 + x * 4) + 1;  // Green Offset
        var bO = (y * width * 4 + x * 4) + 2; // Blue Offset

        var red = byteData.getUint8(rO);  //Red
        var green = byteData.getUint8(gO); //Green
        var blue = byteData.getUint8(bO);   //Blue
        var avg = ((red + green + blue) / 3).round();

        byteData.setUint8(rO, avg);
        byteData.setUint8(gO, avg);
        byteData.setUint8(bO, avg);

        // return the
        return byteData.buffer.asUint8List();
    }
  }
}
Challenges with implementation
There were some rough edges when it came to implementing the filter and some things I learned along the way. Here are some of the biggest learnings that stuck with me.
async is not a separate context
async in flutter does not run in a separate isolate. To run in a separate isolate, the compute constant should instead be used. async runs on the main isolate and all it does is it checks in periodically for any updates when you await the function completion. When I originally wrote this, I was trying to gray an image of twelve million total pixels and this made my process hang since I wrote it in the main isolate. Using the compute constant, I was able to hand off my work to a separate thread and my computation of those millions of pixels came down to a couple hundred milliseconds.
Segmentation Mask does not output pixel to pixel comparison
When I used the segmentation api, I originally was expecting the output to be an array the same size as my input image with confidence scores that lined up accordingly. To my dismay, my app would crash when I tired getting that type of output. Instead, the only output I was able to achieve was a 256x256 sized array of confidences. How would I get my image of millions of pixels to align to this array of tens of thousands of confidences? I would need to normalize the values. To normalize the values, I would take the pixel height that I was inspecting divide it by the total amount of height to get a relative position, and then multiple it by the amount of values I needed to compare (256 but since zero based indexing it would actually be 255). A formula would look something like this:
var normalizedY = ((yOfPixel / totalPossibleY) * 255).round();I could then get the relative location and map it to the new location in my segmentation mask.
What do I do with a callback in a land of Future<T>‘s?
Decoding an image does not output a Future<T> value in the library I was using. It instead output a callback. Having callbacks is okay, but it did not feel natural to have a bunch of async/await calls with Future<T> return types and then one method that took a callback randomly. I wanted to get it to a state where it was more promise based and quickly searched for documentation where I could either get a promise based function instead. What I came across was the Completer class instead. The completer class allows me to take a callback method and return a future by wrapping the method in another method and setting the return type to a Future. An example of this is below:
package 'dart:ui' as ui;
// ...
Future<ui.Image?> decodeImageFromPixelsFuture(Uint8List byteData, int height, int width) async {
  Completer<ui.Image> completer = Completer<ui.Image>();
  ui.decodeImageFromPixels(byteData, width, height, ui.PixelFormat.rgba8888, (result) {
          completer.complete(result);
  });
  return completer.future;
}
Whats next?
While this project was fun to complete, I do have plans to make it a little more finely tuned. In no particular order here are the things I would change in a future iteration of the app.
Migrate off the library I am using instead to tflite
I am using a community run flutter library and while it works great, I think I would like to eventually migrate to a tflite library for selfie segmentation. This would grant me more flexibility in the model I choose to use and would additionally allow me to make adjustments as needed.
Implement a portrait blur
DSLR cameras are cool and I like how they get really nice blurring effects when a low f number is used. I think a similar effect could be achieved with just using a gaussian blur and any regular photo. Gaussian blurs are one of those things that can take some time to process and I think it would be neat to record the processing times of this blur effect in dart and compare it to running a similar blur in wasm on flutter.